
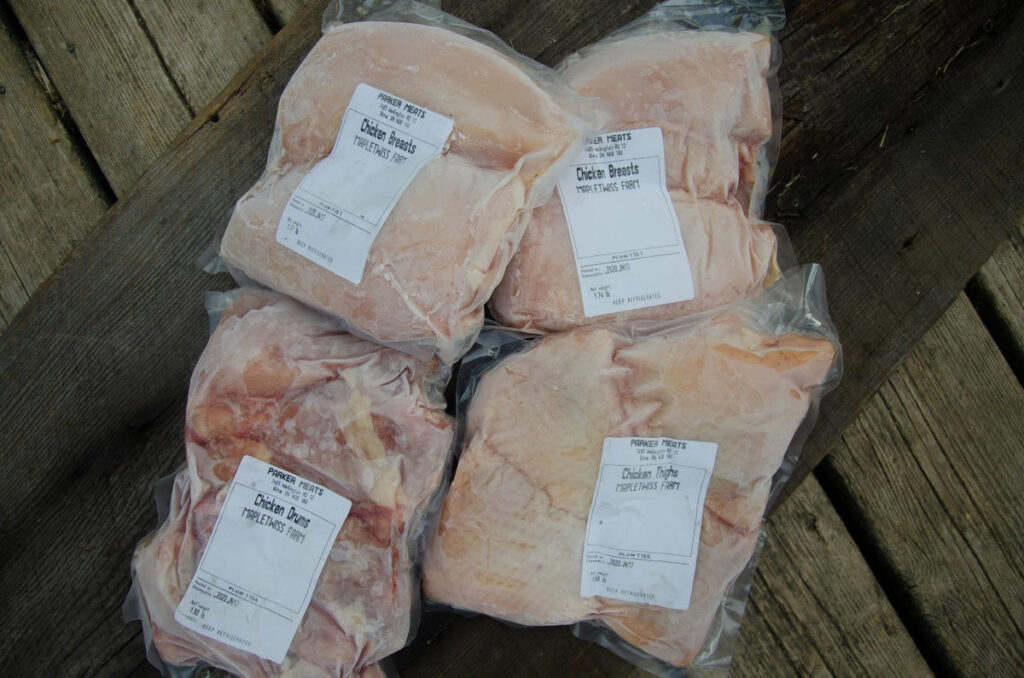
Processing your own chickens can seem intimidating the first time, but it quickly becomes a valuable homesteading skill. Not only does home processing save money, but it also allows you to know exactly how your birds were raised and handled from start to finish.
This guide walks you through the entire process—from preparing your equipment to storing your finished birds.
Before You Begin
Choose healthy birds that are the appropriate age.
Typical processing ages:
| Breed | Age |
|---|---|
| Cornish Cross | 8–10 weeks |
| Freedom Rangers | 10–12 weeks |
| Dual Purpose (Bresse, Orpingtons, etc.) | 16–24 weeks |
| Older Roosters | Any age, but best for stew meat |
Equipment Checklist
Essential Equipment That I Use
- Processing cones – https://amzn.to/44sbC5H
- Sharp boning knife – https://amzn.to/4aWKlvJ
- Scalder (145–150°F) – https://amzn.to/44vMw60
- Thermometer – https://amzn.to/4aV1PZu
- Chicken plucker (optional but highly recommended) – https://amzn.to/3QVi7uH
- Stainless steel processing table – https://amzn.to/3RDjNcn
- Buckets – https://amzn.to/4aW3SfX
- Hose with clean water
- Gloves – https://amzn.to/4bJwhpA
- Ice chest – https://amzn.to/4vC0Gxx
- Ice
- Food-safe sanitizer
- Vacuum sealer or freezer bags – https://amzn.to/4vBRidc
- Labels and marker – https://amzn.to/4wKI4vV
Nice Extras
- Wing restraints
- Apron
- Rubber boots
- Poultry shears
- Scale
- Shrink bags
- Chill tank
Step 1: Prepare the Birds
Do not feed birds for 8–12 hours before processing.
Continue providing water.
This helps empty the digestive tract and makes evisceration much cleaner.
Avoid fasting longer than 12 hours.
Step 2: Set Up Your Processing Station
Arrange stations in this order:
- Dispatch
- Bleeding
- Scalding
- Plucking
- Head and feet removal
- Evisceration
- Washing
- Chilling
- Packaging
Keeping a one-way workflow greatly reduces contamination.
Step 3: Dispatch the Bird
The goal is a quick, humane loss of consciousness followed by rapid bleeding.
Many homesteaders use a killing cone because it safely restrains the bird and allows controlled bleeding.
Use a very sharp knife and make one decisive cut to sever the major blood vessels in the neck while minimizing handling stress.
Allow the bird to bleed for approximately 90 seconds to 2 minutes before moving to the next step.
Step 4: Scalding
Proper scalding makes feather removal much easier.
Soft Scald
- 145–150°F
- 30–60 seconds
- Better skin color
- Harder to pluck
Hard Scald
- 150–155°F
- 20–30 seconds
- Easier plucking
- Removes outer skin layer
Gently agitate the bird in the water to help it reach the skin beneath the feathers.
Test Before Removing
Pull a few wing feathers.
If they come out easily, the bird is ready.
If not, continue scalding for another 5–10 seconds.
Step 5: Plucking
A mechanical plucker usually removes most feathers in 15–30 seconds.
If hand plucking:
- Start with wings
- Then tail
- Breast
- Back
- Legs
- Neck
Remove pin feathers with tweezers or a pinning knife if necessary.
Step 6: Remove the Head and Feet
Using poultry shears or a sharp knife:
- Remove the head.
- Remove the feet by cutting through the joint (rather than the bone) for a cleaner cut.
Step 7: Evisceration (Removing the Internal Organs)
This is often the step that takes the most practice.
Work carefully to avoid puncturing the intestines or gallbladder, which can contaminate the carcass.
Typical sequence:
- Remove the oil gland at the tail (optional).
- Make a small incision near the vent.
- Carefully free the vent without cutting into the intestines.
- Enlarge the opening enough to reach inside.
- Gently pull the organs out in one motion.
- Separate the edible organs (heart, liver, and gizzard) if desired.
- Remove the lungs using a lung scraper or your fingers.
- Remove the crop and windpipe through the neck opening if they were not removed with the viscera.
- Inspect the cavity and rinse thoroughly with clean, potable water.
Step 8: Chill Immediately
Food safety is critical.
Place birds into an ice-water bath as soon as they are cleaned.
Keep the water cold enough that the birds cool quickly. Stir occasionally and add ice as needed.
A common target is to reduce the internal temperature to 40°F (4°C) or below within about 4 hours.
Step 9: Rest Before Freezing
Many experienced processors let chickens rest in the refrigerator for 24–48 hours before freezing.
This allows rigor mortis to pass, resulting in more tender meat.
Keep the birds refrigerated during this rest period.
Step 10: Package for the Freezer
Options include:
- Vacuum-sealed bags
- Heat-shrink poultry bags
- Heavy freezer bags
Label each package with:
- Date
- Breed
- Weight
- Batch number (optional)
Cleaning & Sanitation
Throughout processing:
- Wash hands and gloves frequently.
- Sanitize knives, tables, and tools regularly.
- Keep clean and dirty areas separate.
- Use clean, potable water for rinsing.
- Discard birds that show signs of disease or abnormal odor.
- Clean and sanitize all equipment after processing.
Common Mistakes Beginners Make
- Scalding too cool (feathers won’t release)
- Scalding too hot (skin tears easily)
- Dull knives
- Rushing the evisceration process
- Puncturing the gallbladder
- Not chilling birds quickly enough
- Freezing immediately without allowing the meat to rest
Approximate Timeline (Per Bird)
| Step | Time |
|---|---|
| Dispatch & bleed | 2–3 min |
| Scald | 30–60 sec |
| Pluck | 30 sec–5 min |
| Remove head/feet | 1–2 min |
| Eviscerate | 3–8 min |
| Wash | 1 min |
| Chill | 1–4 hours (batch process) |
Experienced processors often complete the hands-on work in 5–10 minutes per bird, while beginners may take 15–20 minutes.
Frequently Asked Questions
Should I wash the chicken after processing?
Many home processors give the carcass a final rinse with clean, potable water to remove debris. Keep the rinse water clean and chill the bird promptly afterward.
Can I save the organs?
Yes. The heart, liver, and gizzard are commonly saved. The gizzard should be cleaned thoroughly before cooking.
How long will a chicken last in the freezer?
For best quality, use within 9–12 months when vacuum sealed and consistently frozen, though it remains safe longer if kept frozen.
Can I compost the feathers and offal?
Feathers are rich in nitrogen and can be composted. Offal can also be composted if managed properly and local regulations allow, but many homesteaders bury it deeply or dispose of it according to local waste guidelines to avoid attracting scavengers.
Pro Tips for a Smooth Processing Day
- Process in the early morning when temperatures are cooler.
- Keep several sharp knives on hand instead of stopping to sharpen one.
- Have more ice than you think you’ll need.
- Work in batches to keep the workflow efficient.
- Keep a written checklist for each processing station if you’re new.
- If processing many birds, assign helpers to specific stations rather than having everyone do every task.
With preparation, the right equipment, and good sanitation practices, processing your own chickens can become an efficient and rewarding part of running a family homestead.